In recent years, interior design trends have seen a resurgence of timeless patterns and materials. One such classic design element that’s making a big impact in commercial spaces is the herringbone tile pattern. Known for its distinctive V-shaped, zigzag design, herringbone has transcended traditional residential spaces and is now being embraced in office and retail environments. Whether it’s creating a stunning entryway, adding sophistication to a waiting room, or giving a retail space an upscale vibe, herringbone tiles are an excellent choice for modern commercial interiors. This article delves into the reasons behind the growing popularity of herringbone tiles in commercial spaces, explores their benefits, and offers design tips on how to incorporate them into office and retail settings.
Introduction: The Allure of Herringbone Tiles
Herringbone tiles are back in the spotlight in a big way. Known for their geometric beauty, herringbone patterns are synonymous with high-end design, adding texture, depth, and a sense of movement to any space. Traditionally seen in residential spaces like kitchens, bathrooms, and living rooms, the pattern is now a go-to choice for commercial interiors. Offices, retail stores, and even hospitality venues are increasingly incorporating herringbone tiles into their design schemes.
The beauty of herringbone tiles lies in their ability to enhance the overall ambiance of a room, providing a sophisticated yet approachable feel. They can act as a focal point or work harmoniously with other design elements, making them a versatile option for various commercial settings. Whether used on floors, walls, or even as a feature behind reception desks, herringbone tiles bring a unique sense of luxury and modernity to commercial spaces.
A Brief History of Herringbone
The herringbone pattern has a fascinating history that dates back thousands of years. It was first used by the ancient Romans to construct durable roads, where the pattern’s V-shaped design was crucial for providing strength and stability. The symmetry of the herringbone pattern distributed weight evenly, allowing the roads to withstand the test of time and heavy traffic.
Fast forward to the 16th century, and herringbone was adopted by European craftsmen for parquet flooring. Its distinctive design became a symbol of craftsmanship and opulence, particularly in aristocratic and royal homes. Over time, the pattern spread throughout European design, becoming a hallmark of luxury and high-end interiors. In the 20th century, herringbone became synonymous with Art Deco and mid-century modern design, cementing its place as a design classic.
Today, herringbone tiles are not just for floors—they are used across a variety of surfaces, from walls to backsplashes to outdoor patios. Their ability to adapt to different materials and settings has made them a favorite choice for both residential and commercial applications.
See more: Factory Outlet Furniture Sydney: Bargains Without Sacrificing Style
Why Herringbone is Back in Style
Herringbone tiles are experiencing a modern resurgence for several compelling reasons. These include their aesthetic appeal, versatility, and ability to elevate a space without overwhelming it. Here’s why herringbone is back in style—especially in commercial spaces:
1. Versatility Across Design Styles
One of the main reasons herringbone tiles are so popular in commercial design is their versatility. They can be integrated seamlessly into a variety of styles, from sleek and minimalist to traditional or rustic. The clean lines and geometric design of herringbone tiles make them adaptable, working well in modern office environments as well as more classical retail settings. Whether used in high-end boutiques, corporate lobbies, or casual coffee shops, the pattern can be tailored to fit the space’s character.
2. Aesthetic Appeal
The dynamic V-shape of herringbone tiles is visually striking. The movement of the design creates a sense of flow, which is particularly beneficial in large or open spaces. The way light interacts with the pattern gives the surface depth, bringing attention to specific areas, such as an entryway or the focal point behind a reception desk. This visual interest is a major draw for commercial interiors, where the goal is often to leave a lasting impression on clients, visitors, and customers.
3. Enhanced Perception of Space
Herringbone tiles can be used to create a sense of spaciousness in a room. The angular lines and geometric nature of the design draw the eye, guiding it along the length of the pattern. In narrow spaces, such as corridors or narrow retail aisles, herringbone tiles can create the illusion of more space, making the area feel larger and more open. This makes them particularly well-suited for commercial spaces that want to enhance the flow and movement of people.
4. Durability and Functionality
Herringbone tiles are not only beautiful but also functional. Available in a range of materials, including porcelain, ceramic, and natural stone, these tiles are incredibly durable and easy to maintain. In high-traffic commercial areas like offices and retail stores, functionality is key. Herringbone tiles provide the durability needed for such spaces while offering aesthetic value. Furthermore, they are resistant to wear and tear, stains, and moisture, making them suitable for both floors and walls.
Design Applications: Where Herringbone Tiles Work Best
The beauty of herringbone tiles is their versatility in various commercial settings. Here’s where herringbone tiles shine:
1. Offices and Lobbies
The use of herringbone tiles in office spaces, especially in lobbies and reception areas, can create an upscale and professional ambiance. Whether made from luxurious materials like marble or more affordable options like porcelain, the herringbone design adds sophistication without being overpowering. The pattern can be used on the floors to set the tone for the entire office or as a feature wall behind the reception desk. The V-shaped pattern draws visitors’ eyes, making a lasting first impression.
2. Retail Stores
Herringbone tiles are becoming increasingly popular in retail spaces. Whether it’s a boutique, a luxury store, or even a casual café, herringbone tiles add a sense of elegance and class. In high-end fashion boutiques, marble or glossy porcelain tiles in a herringbone pattern create a stylish and luxurious atmosphere. For more casual stores, wood-look tiles offer warmth and a welcoming vibe while still maintaining a sophisticated edge.
3. Hospitality Venues
In hospitality venues like hotels and restaurants, herringbone tiles are being used to create an inviting atmosphere. In hotels, the lobby or corridors often feature herringbone floors or walls, giving guests a sense of comfort and luxury. In restaurants, the tiles can be used as a backsplash behind the bar or kitchen area, enhancing the overall dining experience. The use of herringbone tiles in high-end and trendy eateries elevates the space, aligning with the modern and contemporary vibe that is sought after in today’s hospitality design.
4. Outdoor Spaces
Herringbone tiles aren’t limited to indoor spaces; they are also an excellent choice for outdoor areas. Patios, terraces, and garden walkways can all benefit from the visual appeal of herringbone. Porcelain and natural stone herringbone tiles are durable and weather-resistant, making them an ideal choice for exterior commercial spaces. Using the pattern outside creates continuity between the interior and exterior, providing a cohesive design experience for visitors.
Materials and Finishes: Choosing the Right Option for Commercial Spaces
The material you choose for your herringbone tiles can significantly impact the aesthetic and functionality of your commercial space. Here are some popular materials and finishes:
1. Ceramic and Porcelain Tiles
Ceramic and porcelain tiles are the most common and affordable choices for herringbone patterns in commercial spaces. These materials are available in a wide range of colors, finishes, and sizes, making them adaptable to any design style. Porcelain, in particular, is known for its durability, making it a great option for high-traffic areas. Glossy finishes can create a more modern, sleek look, while matte finishes offer a more understated elegance.
2. Marble
Marble herringbone tiles are synonymous with luxury and are ideal for high-end commercial spaces like boutiques, restaurants, and luxury office buildings. The natural veining in marble creates a sophisticated visual effect, adding texture and depth to the space. However, marble is more expensive and requires regular maintenance to maintain its appearance.
3. Wood-Look Tiles
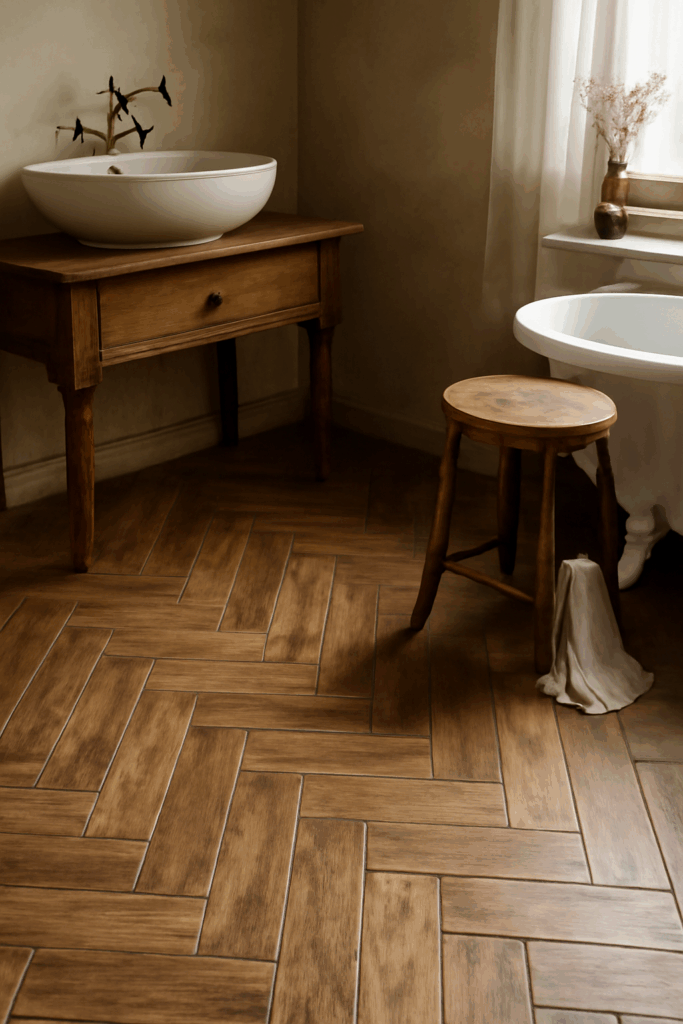
Wood-look tiles in a herringbone pattern are increasingly popular in commercial spaces, especially in hospitality and retail environments. These tiles offer the warmth and natural beauty of wood but with the durability and easy maintenance of porcelain or ceramic. They work well in cafes, restaurants, and retail stores where a cozy, welcoming vibe is important, without sacrificing durability.
4. Concrete and Stone
For a more industrial or rustic look, concrete and natural stone herringbone tiles are an excellent choice. These materials can be used to achieve a rugged yet sophisticated feel, particularly in modern office spaces and trendy retail settings. Concrete tiles are durable and have a minimalist appeal, while stone tiles, such as slate or limestone, offer texture and natural beauty.
Pros and Cons of Herringbone Tiles
Like any design element, herringbone tiles come with their advantages and challenges. Here’s a balanced view:
Pros
- Timeless Appeal: Herringbone tiles are a classic design element that remains stylish for years, providing long-term value to your space.
- Visual Interest: The V-shaped pattern creates movement and texture, drawing the eye and adding depth to a space.
- Durability: Available in a variety of materials, herringbone tiles are highly durable and ideal for high-traffic commercial spaces.
- Versatility: Herringbone works in both traditional and contemporary settings, making it an adaptable design choice.
Cons
- Complex Installation: Herringbone tiles require precise cutting and alignment, making the installation process more time-consuming and expensive.
- Cost: Premium materials like marble or natural stone can drive up the overall cost of installation.
- Maintenance: Some materials, such as marble, require more upkeep to maintain their appearance, especially in high-traffic commercial spaces.
Styling Tips for Commercial Spaces
To make the most of herringbone tiles in commercial spaces, here are a few styling tips:
- Use Contrasting Grout: A contrasting grout color can make the herringbone pattern pop, creating a bold visual statement.
- Play with Materials: Mix different materials, such as porcelain and natural stone, to create a unique look that reflects the character of your business.
- Focus on Scale: Larger tiles create a more dramatic effect, while smaller tiles offer a more intricate, delicate appearance. Consider the size of your space when choosing the tile size.
Future of Herringbone in Commercial Design
As sustainability continues to influence design, we may see more eco-friendly options for herringbone tiles, such as those made from recycled materials or sustainable production methods. The versatility of herringbone ensures that it will continue to be a favorite choice for commercial spaces, with new materials and innovative designs emerging to meet the evolving needs of modern interiors.
Conclusion: Elevating Commercial Design with Herringbone Tiles
Herringbone tiles are no longer just for residential spaces—they are making a significant impact in commercial design, offering a unique blend of beauty, functionality, and versatility. Whether used in retail, hospitality, or office spaces, herringbone tiles add sophistication, texture, and timeless appeal. With the right materials, installation, and design choices, herringbone tiles can elevate any commercial space, creating a memorable experience for customers and visitors alike.